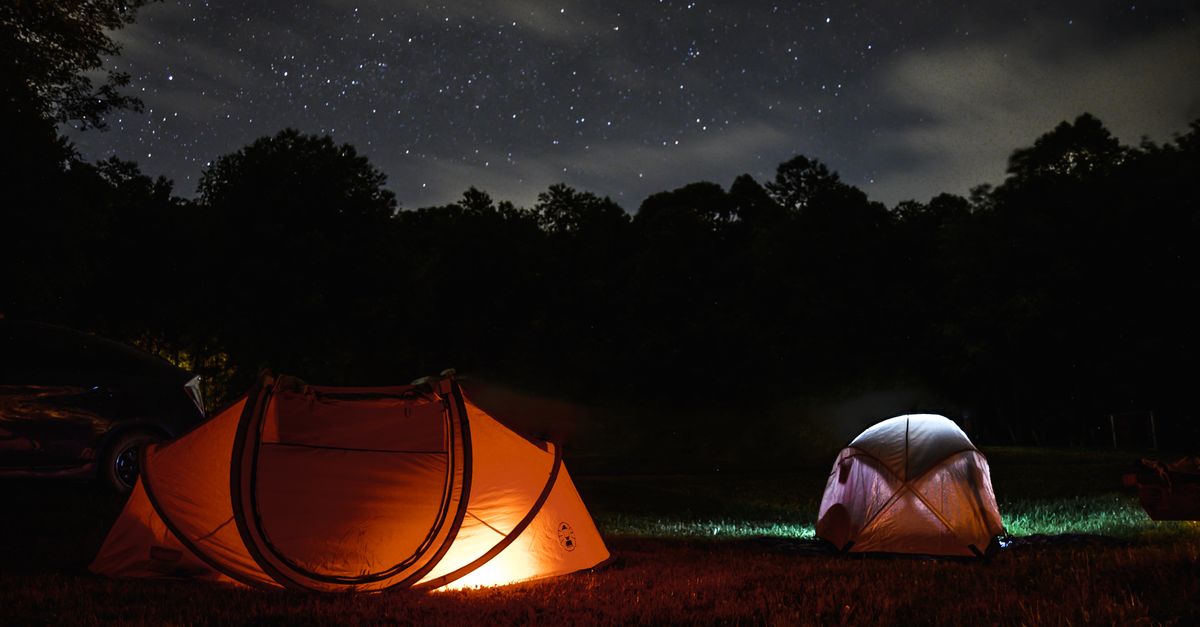
Why Most Budget Camping Tents Fail You (And What Actually Works for Real Durability and Comfort)
The crisp mountain air, the crackle of a campfire, the endless stars above… camping promises a serene escape. But for too many, this idyllic vision is shattered by a fundamental piece of gear: the tent. I’ve seen it firsthand, and frankly, I’ve lived through it more times than I care to admit. You browse online, see a tent for what seems like an incredible deal – maybe $50 or $75 – with glowing reviews from first-time campers. It looks good in the pictures, claims to be ‘waterproof’ and ‘easy to set up.’ You buy it, full of optimism.
Then comes the trip. A gentle drizzle turns into a persistent rain, and soon you discover your tent is less a shelter and more a sieve. Or maybe a sudden gust of wind morphs your ‘easy-to-set-up’ poles into a tangled mess of broken fiberglass. Perhaps the zipper snags on day two, trapping you inside or leaving you exposed to bugs. These aren’t isolated incidents; they’re the predictable downfall of the vast majority of budget camping tents. The reality is, what you save in upfront cost, you almost always pay for in frustration, discomfort, and often, a ruined trip. And, let’s be honest, you end up buying another tent sooner than you ever expected.
In my years of camping, from casual weekend getaways to multi-day backcountry treks, I’ve learned that a tent is not an area to skimp. It’s your primary shelter, your home away from home. Its failure means the failure of your entire outdoor experience. This isn’t about buying the most expensive gear on the market, but about understanding where budget cuts impact performance most critically and how to invest smartly for durability and real comfort.
Key Takeaways
- Budget tents often cut costs on crucial materials like fabric denier, pole construction, and seam sealing, leading to inevitable failures in real-world conditions.
- True value in a tent comes from investing in features that directly impact durability, weather resistance, and ease of use, rather than chasing the lowest price.
- Prioritize quality fabrics (higher denier nylon/polyester), robust poles (aluminum alloy), and fully taped seams to ensure your tent withstands the elements.
- Look for tents with a full-coverage rainfly, ample ventilation, and reliable, smooth-gliding zippers for long-term satisfaction and comfortable camping.
The Illusion of ‘Waterproof’ Fabric and How It Fails You
When you read ‘waterproof’ on a budget tent’s description, it’s usually a half-truth. The vast majority of cheap tents use thin, low-denier polyester or nylon with a minimal polyurethane (PU) coating. While technically waterproof when new, this coating is typically applied in a single, thin layer and offers a very low hydrostatic head rating (HH, a measure of water resistance – often just 800-1500mm). This is barely adequate for a light, short drizzle, let alone a sustained downpour.
The mistake I see most often is campers assuming all ‘waterproof’ ratings are equal. They’re not. A truly weather-resistant tent for anything more than fair-weather backyard camping needs a higher HH rating, ideally 2000mm+ for the fly and 3000mm+ for the floor. But beyond the coating, the fabric itself plays a huge role. Cheap tents use low-denier fabric (e.g., 68D or even 40D polyester for the floor), which is susceptible to tears, abrasions, and UV degradation. Over time, UV exposure breaks down the fabric and the PU coating, causing it to delaminate, flake off, and lose its waterproofing entirely. I’ve had budget tent floors become sticky and shed their coating after just a few sunny trips, turning the tent into a leaky sponge.
What changed everything for me was prioritizing fabric denier and robust coatings. Instead of generic polyester, I now look for tents with at least 75D polyester or nylon for the fly and a minimum of 150D for the floor, preferably with multiple layers of PU coating or even silicone treatment for enhanced durability and UV resistance. This seemingly small detail means your tent won’t just repel water; it will withstand the sun’s harsh rays, resist punctures from errant twigs, and maintain its integrity for years, not just seasons. Think of it as investing in the shell of your house – you wouldn’t use cardboard for walls, so don’t settle for flimsy fabric that won’t protect you from the elements.
The Unseen Weakness: Poles and Zippers That Buckle Under Pressure
Beyond the fabric, the structural integrity of a tent hinges on its poles and the functionality of its zippers. This is where budget tents commit some of their gravest sins, often in ways that aren’t immediately apparent in a product photo.
Most budget tents come with fiberglass poles. While inexpensive to manufacture, fiberglass is notoriously brittle. I’ve personally watched fiberglass poles splinter and snap during a moderate wind gust, turning a perfectly pitched tent into a sagging mess in minutes. They also tend to degrade with UV exposure and use, developing microscopic cracks that weaken them further. The elastic shock cord inside often stretches out quickly, making assembly a frustrating ordeal of disconnected segments. This isn’t just an inconvenience; it can be a safety issue if your shelter collapses in a storm. The ‘bargain’ price evaporates when you’re scrambling for duct tape in the dark, or worse, have to cut your trip short.
Similarly, cheap zippers are an Achilles’ heel. Budget tents almost universally use no-name zippers with plastic teeth or flimsy metal sliders. These are prone to snagging on the tent fabric, separating mid-zip, or breaking entirely. Imagine being caught in a mosquito swarm with a jammed tent door, or trying to pack up only to find the main zipper won’t close. I’ve experienced the sheer frustration of a tent zipper failing, leaving me exposed to bugs, wind, or rain. The constant battle with a sticky zipper wears down your patience faster than any challenging hike.
My recommendation is to insist on aluminum alloy poles (e.g., DAC Featherlite, Easton, or generic 7000-series aluminum), even for casual camping. They are significantly stronger, more flexible, and lighter than fiberglass. They might add $50-$100 to the tent’s price, but this is a non-negotiable safety and durability upgrade. For zippers, YKK zippers are the gold standard. They are designed for repeated use, glide smoothly, and are far less likely to fail. Look for larger gauge zippers on main doors. These components are the foundation of your tent’s usability and longevity; cutting corners here is a guaranteed path to disappointment.
The Fatal Flaw of Inadequate Rainfly Design and Seam Sealing
Many budget tents promise ‘waterproofing’ but completely fail on the design elements that deliver real-world weather protection. The most common culprit is an inadequate rainfly that doesn’t fully cover the tent body. Often, budget tents feature a ‘cap-style’ rainfly that only covers the roof, leaving mesh panels and the tent walls exposed. This is a critical design flaw, as rain doesn’t just fall straight down; it can blow sideways, soak through exposed mesh, and run down the tent walls, pooling on the floor. I’ve woken up in a puddle because a cap-style rainfly let rain seep through the exposed side walls, despite the roof being ‘waterproof.’
Compounding this issue is poor or absent seam sealing. Even if a fabric is waterproof, every seam where two pieces of fabric are sewn together creates tiny needle holes. For a tent to be truly waterproof, these seams must be factory-taped or sealed. Budget tents often skip this crucial step entirely or use low-quality, easily delaminating tape. I’ve spent frustrating hours manually applying seam sealant to a new, supposedly ‘waterproof’ tent, only to find the factory taping failed after a few uses. This is a task you shouldn’t have to do on a new tent.
To avoid these failures, always look for a full-coverage rainfly. This means the rainfly extends all the way down to the ground on all sides, providing a complete barrier against wind and rain. Crucially, it should create vestibules for gear storage. Secondly, verify that all seams are factory-taped and sealed. High-quality tents explicitly state this in their specifications. This ensures that the weak points where water could enter are proactively protected, keeping you and your gear dry even in a deluge. This combination of a well-designed rainfly and properly sealed seams moves a tent from ‘fair-weather friend’ to ‘reliable shelter’ – an essential distinction for anyone serious about enjoying the outdoors.
Overlooking Ventilation and Setup Complexity: Your Comfort and Sanity at Stake
Camping isn’t just about staying dry; it’s about being comfortable. Two often-overlooked aspects where budget tents fall short are ventilation and ease of setup, both of which profoundly impact your overall experience.
Poor ventilation in a tent leads to condensation problems. On a cool night, the warm, moist air from your breath and body hits the cooler tent fabric (especially the inside of the rainfly), condenses, and forms water droplets. In a poorly ventilated tent, these droplets accumulate, making it feel like it’s raining inside your tent. I once endured a night in a cheap tent where the interior was so saturated with condensation, my sleeping bag was damp by morning. This isn’t just uncomfortable; it can compromise the insulating properties of your sleeping bag and lead to a miserable night, or even hypothermia in colder conditions. Budget tents often skimp on mesh, only offering small vents or limiting the rainfly’s ability to be pitched for airflow.
Equally frustrating is excessive setup complexity. Many budget tents use sleeves rather than clips for pole attachment. Threading long, flexible poles through fabric sleeves, especially in windy conditions or low light, is a recipe for exasperation. Poles snag, fabrics tear, and what should be a 5-minute task turns into a 20-minute wrestling match. The first time I tried setting up a budget dome tent in a crosswind, the poles repeatedly collapsed, and I nearly threw the whole thing back into the car. This kind of stress saps the joy out of arrival, particularly after a long day of hiking.
For improved ventilation, seek tents with ample mesh on the tent body and a rainfly that has adjustable vents or can be partially rolled up. A full-coverage rainfly with multiple guy-out points can be pitched slightly off the tent body to create airflow, preventing condensation. As for setup, prioritize tents with a clip-on design for poles. This makes pitching incredibly fast and easy, even for one person, and significantly reduces the risk of pole damage or fabric tears. Look for color-coded poles and clips for foolproof assembly. These considerations might seem minor when browsing online, but they make a world of difference when you’re tired, it’s getting dark, or a storm is brewing. Your comfort and mental well-being are worth the extra investment.
The True Cost of Cheap Tent Accessories and a Lack of Features
While the main tent components are critical, budget tents often reveal their true cost through the poor quality of their accompanying accessories and a severe lack of thoughtful features. These might seem like minor details, but they directly impact usability, organization, and the longevity of your investment.
Most budget tents come with flimsy, inadequate tent stakes – thin, bent-wire affairs that bend or pull out of the ground with the slightest tension or wind. I’ve arrived at a campsite with a new, cheap tent, only to have half the stakes mangle on the first push into moderately firm ground. This immediately compromises the tent’s stability and your peace of mind. Similarly, the guy lines (ropes for stability) are often thin, non-reflective, and lack tension adjusters, making it impossible to properly secure the tent in wind and a trip hazard in the dark.
Furthermore, budget tents severely lack internal organization and practical features. Think about your phone, headlamp, keys, or a book. Where do they go? In a cheap tent, you’ll likely find no pockets, no gear lofts, or maybe just one tiny, poorly stitched pocket. Everything ends up on the floor, getting lost, wet, or damaged. I’ve fumbled in the dark for my headlamp too many times because there was nowhere to keep it organized and accessible. This isn’t just an inconvenience; it can lead to damaged electronics or misplaced essentials when you need them most.
What actually works is to invest in a tent that comes with quality aluminum V-stakes or Y-stakes (or budget to replace the cheap ones immediately). Look for robust, reflective guy lines with integrated tensioners. More importantly, seek tents with multiple mesh storage pockets and a gear loft. These features keep your essentials off the floor, organized, and easily accessible. Consider tents with dual doors for easier entry/exit, especially with multiple campers, and larger vestibules for storing muddy boots and wet gear outside the main sleeping area. These thoughtful additions enhance comfort, organization, and safety, turning your tent from a mere shelter into a functional, enjoyable basecamp. You’ll thank yourself for spending a little more upfront for a tent that truly supports your adventure, rather than hindering it.
Frequently Asked Questions
Q: Is it ever okay to buy a budget tent? For example, for kids’ backyard camping?
A: Yes, for very specific, low-stakes scenarios, a budget tent can be okay. For backyard camping on a clear, dry night, or as a play tent for kids, the risks of failure (leaks, broken poles) are minimal. However, understand its limitations: it’s not designed for real weather or extended use. Even for casual use, consider upgrading the stakes immediately, as the ones included are typically useless.
Q: What’s the minimum I should expect to spend on a reliable camping tent?
A: For a genuinely reliable, durable tent suitable for general camping (frontcountry, car camping, light backpacking), you’re typically looking at a starting price range of $150-$300 for a reputable brand’s entry-level models. This price point usually ensures aluminum poles, better quality fabrics (70-75D), full-coverage rainfly, and taped seams. Anything significantly below this usually involves major compromises that will likely lead to frustration.
Q: How can I tell if a tent has good ventilation before buying?
A: Look for product images that show the tent with the rainfly on. Does it have large mesh sections on the tent body when the rainfly is off? Does the rainfly extend far enough from the tent body, especially at the sides, to allow airflow? Are there dedicated, closable vents on the rainfly itself? A full-coverage rainfly that can be pitched to allow a gap between it and the inner tent is also a good sign, as it promotes airflow while still protecting from rain. Dual doors and vestibules also contribute significantly to cross-ventilation.
Q: What’s the difference between a tent’s ‘denier’ and its ‘hydrostatic head’ rating?
A: Denier (D) refers to the thickness and density of the fabric’s individual fibers. A higher denier (e.g., 75D vs. 40D) means a thicker, more durable, and abrasion-resistant fabric. Hydrostatic Head (HH) is a measure of the fabric’s waterproofness, typically expressed in millimeters (mm). It indicates the height of a column of water the fabric can withstand before water penetrates. A higher HH rating (e.g., 2000mm vs. 1000mm) means the fabric is more waterproof.
Q: Can I make a budget tent more durable or waterproof after buying it?
A: You can certainly try! Applying a seam sealer to all seams (interior and exterior) will greatly improve waterproofing if they’re not factory-taped. You can also reapply DWR (Durable Water Repellent) spray to the rainfly to improve water beading. Replacing flimsy fiberglass poles with aftermarket aluminum poles (if compatible sizes are available) or upgrading the stakes and guy lines are also effective improvements. However, these are additional costs and effort that often bring the total investment close to what a better quality tent would have cost originally, and they won’t fix fundamental design flaws like inadequate rainfly coverage or poor fabric denier.
Conclusion
Buying a budget camping tent can feel like a smart financial move, but in my experience, it’s often a false economy. The compromises made in materials, construction, and design almost guarantee a frustrating, uncomfortable, or even prematurely ended trip. From leaky fabrics and fragile poles to snagging zippers and suffocating condensation, these ‘bargains’ rarely deliver on the promise of a peaceful outdoor escape.
Instead of chasing the lowest price, invest in a tent that prioritizes durability, weather resistance, and thoughtful features. Look for higher denier fabrics, aluminum poles, YKK zippers, a full-coverage rainfly, factory-taped seams, and good ventilation. These aren’t luxury add-ons; they are the fundamental elements that determine whether your tent is a reliable shelter or a source of regret. The initial higher cost is a worthwhile investment in countless comfortable nights under the stars, knowing you’re protected from whatever the elements throw your way. Your future self, dry and rested, will thank you.
Written by Dana Okafor
Wellness, daily routines, and home life
An occupational therapist, Dana focuses on the physical and emotional friction that makes generic self-improvement advice hard to sustain.
You Might Also Like

Why Most Personal Reinventions Fail (And The Layered Identity Strategy That Actually Works)
Discover why common personal reinvention attempts fall short and learn the 'Layered Identity' strategy for lasting transformation.

The Hidden Cost of Social Media News Consumption That Nobody Talks About (And How I Found Real Clarity)
Discover the unseen drains of consuming news via social media, and how switching sources brought back my focus and peace of mind.
Why Most Beginners Fail at Mastering Their New Microwave (And What Actually Works for Real Efficiency)
Unlock your microwave's true potential. Discover why common mistakes lead to frustration and learn what actually works for perfectly heated meals, every time.